If you want to learn how to solder a joint correctly click on this link first. Click on the tabs above to see examples of good and bad soldering.
Use an abrassive pad to remove any oxidisation from the circuit board or the solder will not stick to it well. Oxidised copper will look brown like an old 2p but a freshly cleaned one will be bright and pink.
Check that the wires of the components you are soldering in place are clean, they should be bright and silver coloured.
Ensure that the soldering iron has had time to heat up to the correct temperature before use.
Wipe the soldering iron tip on the sponge before and after soldering a component, this will ensure that old oxidised solder will not come into contact with the joint causing dry joints.
Hold the soldering iron on the circuit board track and component wire for enough time for them to become hot before starting to melt the solder.
Always move the solder away from a finished joint before the soldering iron otherwise the solder can get fused to the joint.
Never melt solder onto the tip of the iron and then try to apply it to the joint, this is likely to produce a dry joint.
These two joints have been soldered perfectly. The solder has flowed around the wire and onto the track of the circuit board and formed a consistent shape. The solder will also appear bright and shiny.

The joint on the left shows that too much solder has been applied causing it to form a blob of solder. This can cause solder to flow onto adjacent tracks and cause shorts. The joint on the right is perfect.

The joint on the left demonstrates that the circuit board is either dirty or has not been heated sufficiently to allow solder to flow.
The joint on the right shows solder surrounding the wire but is not attached to it, this can be caused by the wire being dirty or not being heated sufficiently. With this type of fault it can sometimes look as through the component is soldered in place correctly but on closer inspection the solder is not stuck to the wire.

The joint on the left shows that too little solder has been applied, although an electrical connection is made it is possible for the joint to be weak and the wire to come loose.
The joint on the right shows that the solder has not flowed onto the circuit board or wire sufficiently due to oxidised wires and tracks.

These two joints show what happens if the copper track is oxidised, the solder is able to stick to the wire but not the circuit board.

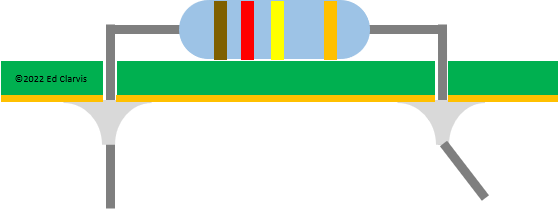
Although the soldered joints are perfect, the component is some distance from the circuit board. Sometimes this is done on purpose when a high power components that can become hot and burn the circuit board.

The soldered joints are perfect but the resistor is soldered at an odd angle. This can happen when the component comes loose after it has been turned over for soldering. A way of avoiding this is to bend the component's wires slightly outwards to prevent it from becoming loose when the circuit board is turned over.

Here the component wires have not been trimmed, leaving stray metal. This can cause shorts between tracks.

A dry joint is where the solder has been exposed to heat for too long causing it to oxidise and for the flux to burn off. This causes a rough dull joint which will be weak and may not make an electrical connection. Sometimes this can occur when the sodlering iron tip has not been cleaned sufficiently between joints.

